Tutorial: 2in1 animation
Aug. 13th, 2013 08:04 pmThis is a tutorial on how to combine two animations on one canvas, created with Animationshop3
Could be there`s an easier way to do this, but it works for me just fine
So, we`re going to put these two animations onto one canvas (I`m lazy, I simply just (edited and ) used two of my latest animations for this tutorial)
 |  |
I`ve already explained how I do my animations, my *svala`s animation 101* can be found here:
general animation tutorial (in 3 parts) CLICK CLICK
done with PaintShopPro9 and Animationshop3
creating a 2in1 is easy, once you have the animations you want to combine.
I take it you already have two finished anis, awesome, let`s go to Animationshop3
WARNING: IMAGE HEAVY !!!
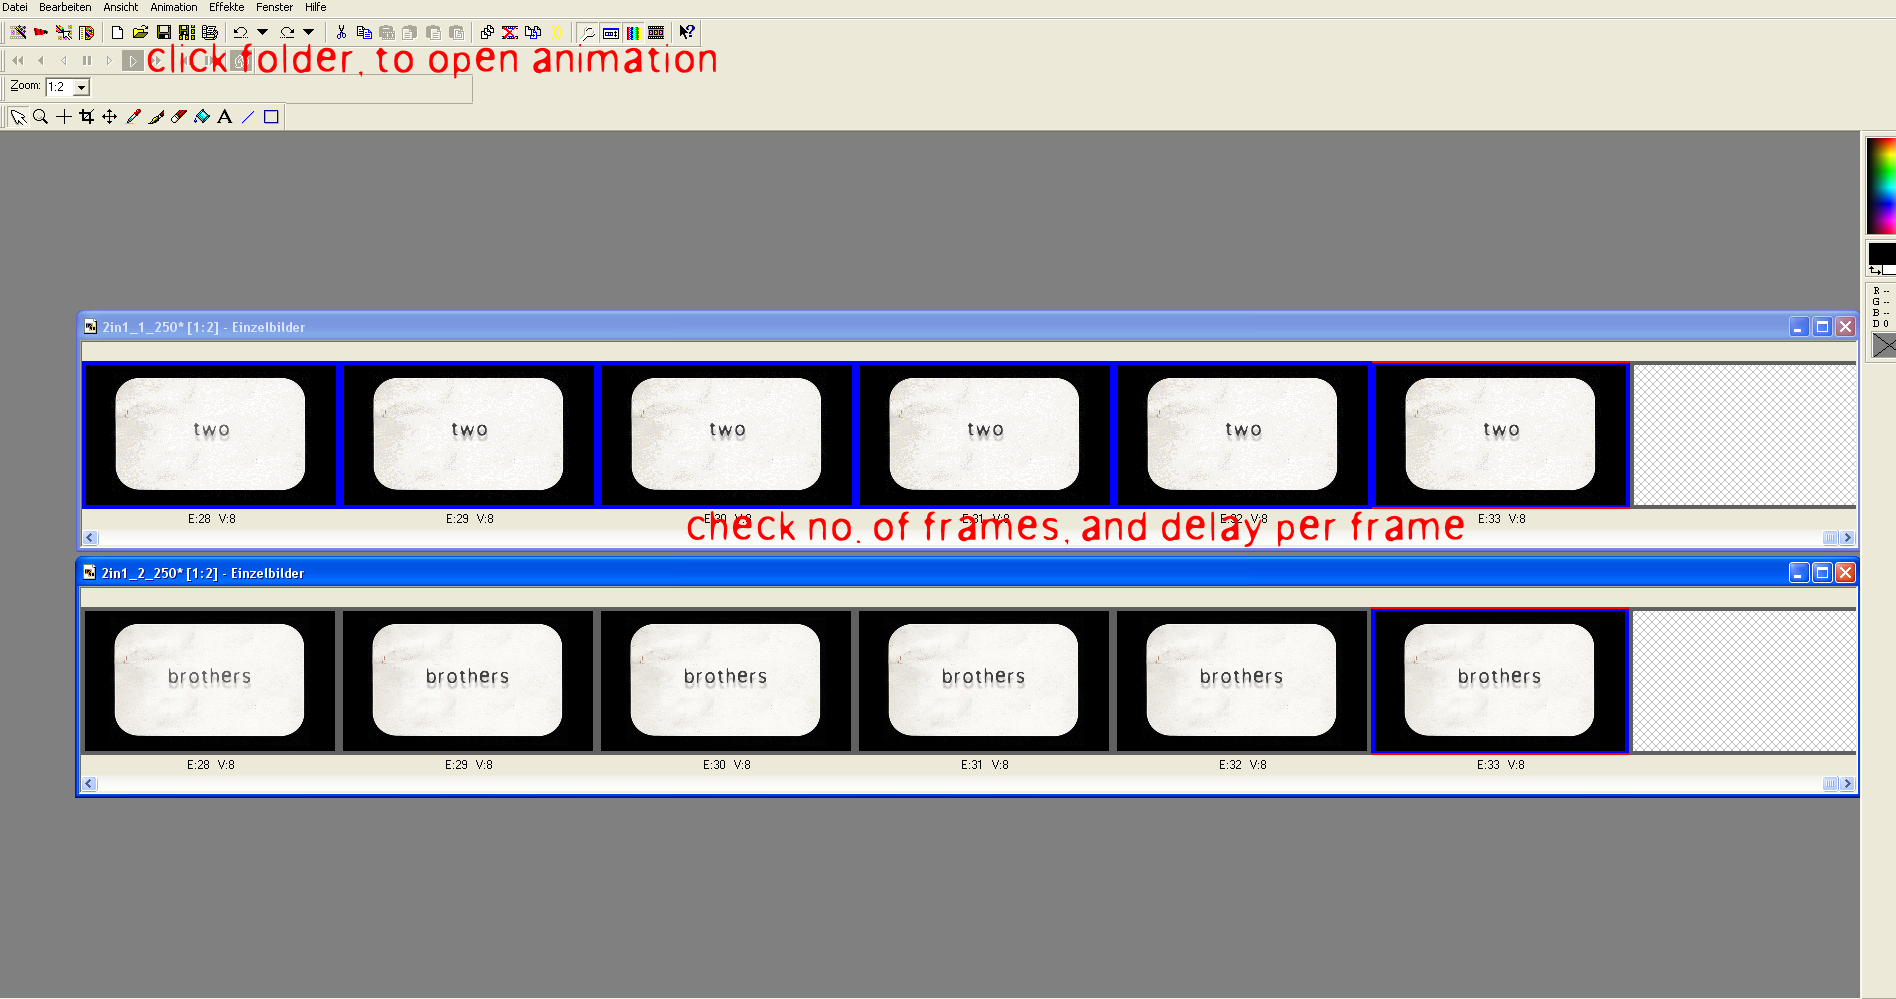
1. Open both of your animations in Animationshop
(or, open your animation caps, that`s how I do it, as explained in my pervious tutorial)
you need to make sure both animations have the same amount of frames, and the same frame delay
in this case:
E:33 = number of frames
V:8 = frame delay
- if one animation has too many frames, delete some until you have a matching number
- if there is a difference in frame delay
click on the ani you want to change, go to - EDIT - CHOOSE ALL
(now you`ve selected all of your animation caps)
Go back to your caps, right click on any of the caps, a new window shows up
go to FRAME PROPERTIES
this will bring back a window where you can pick the time/frame. Change the frame delay until you have a matching number for both animations
 |
DIRECT LINK
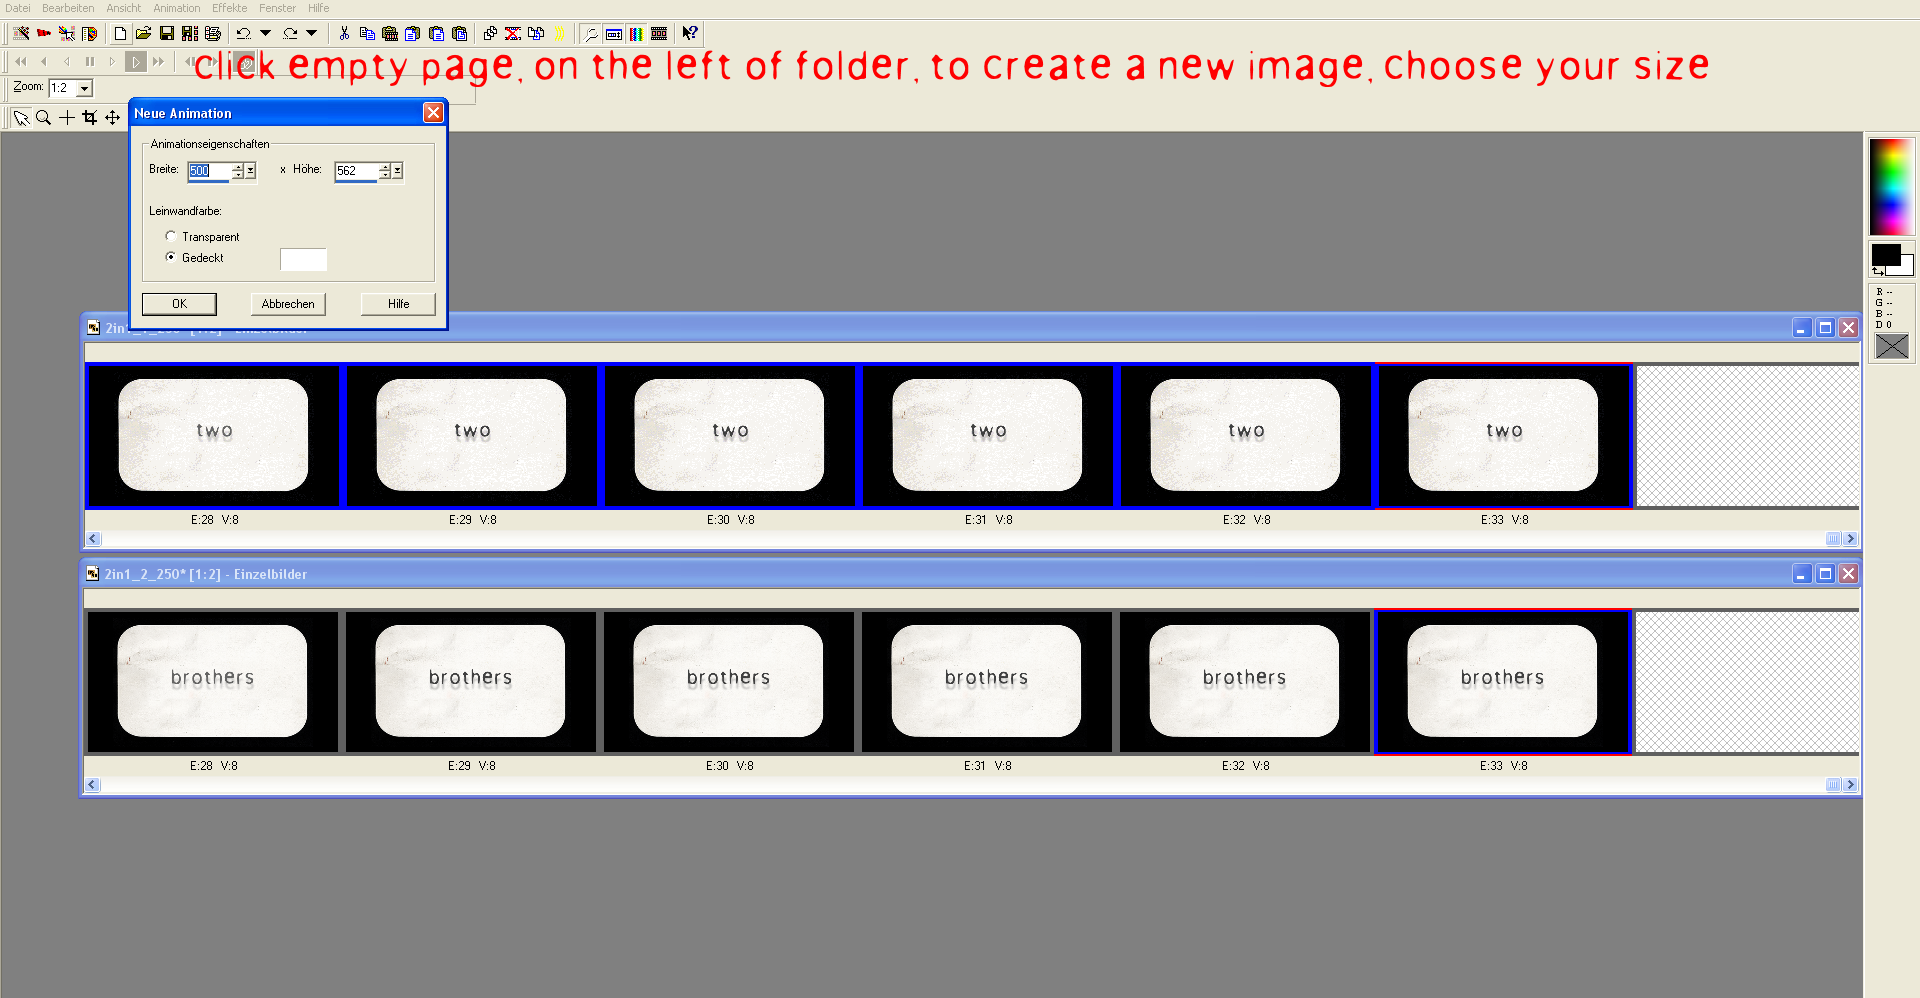
2. Create a new image, click on the empty page that`s next to the folder you just used to open your animations.
A new window opens, choose your filze size, and color. In this case it`s a 500x562 white image (white because the background of my anis is black. And black on black, doesn´t really work)
 |
DIRECT LINK
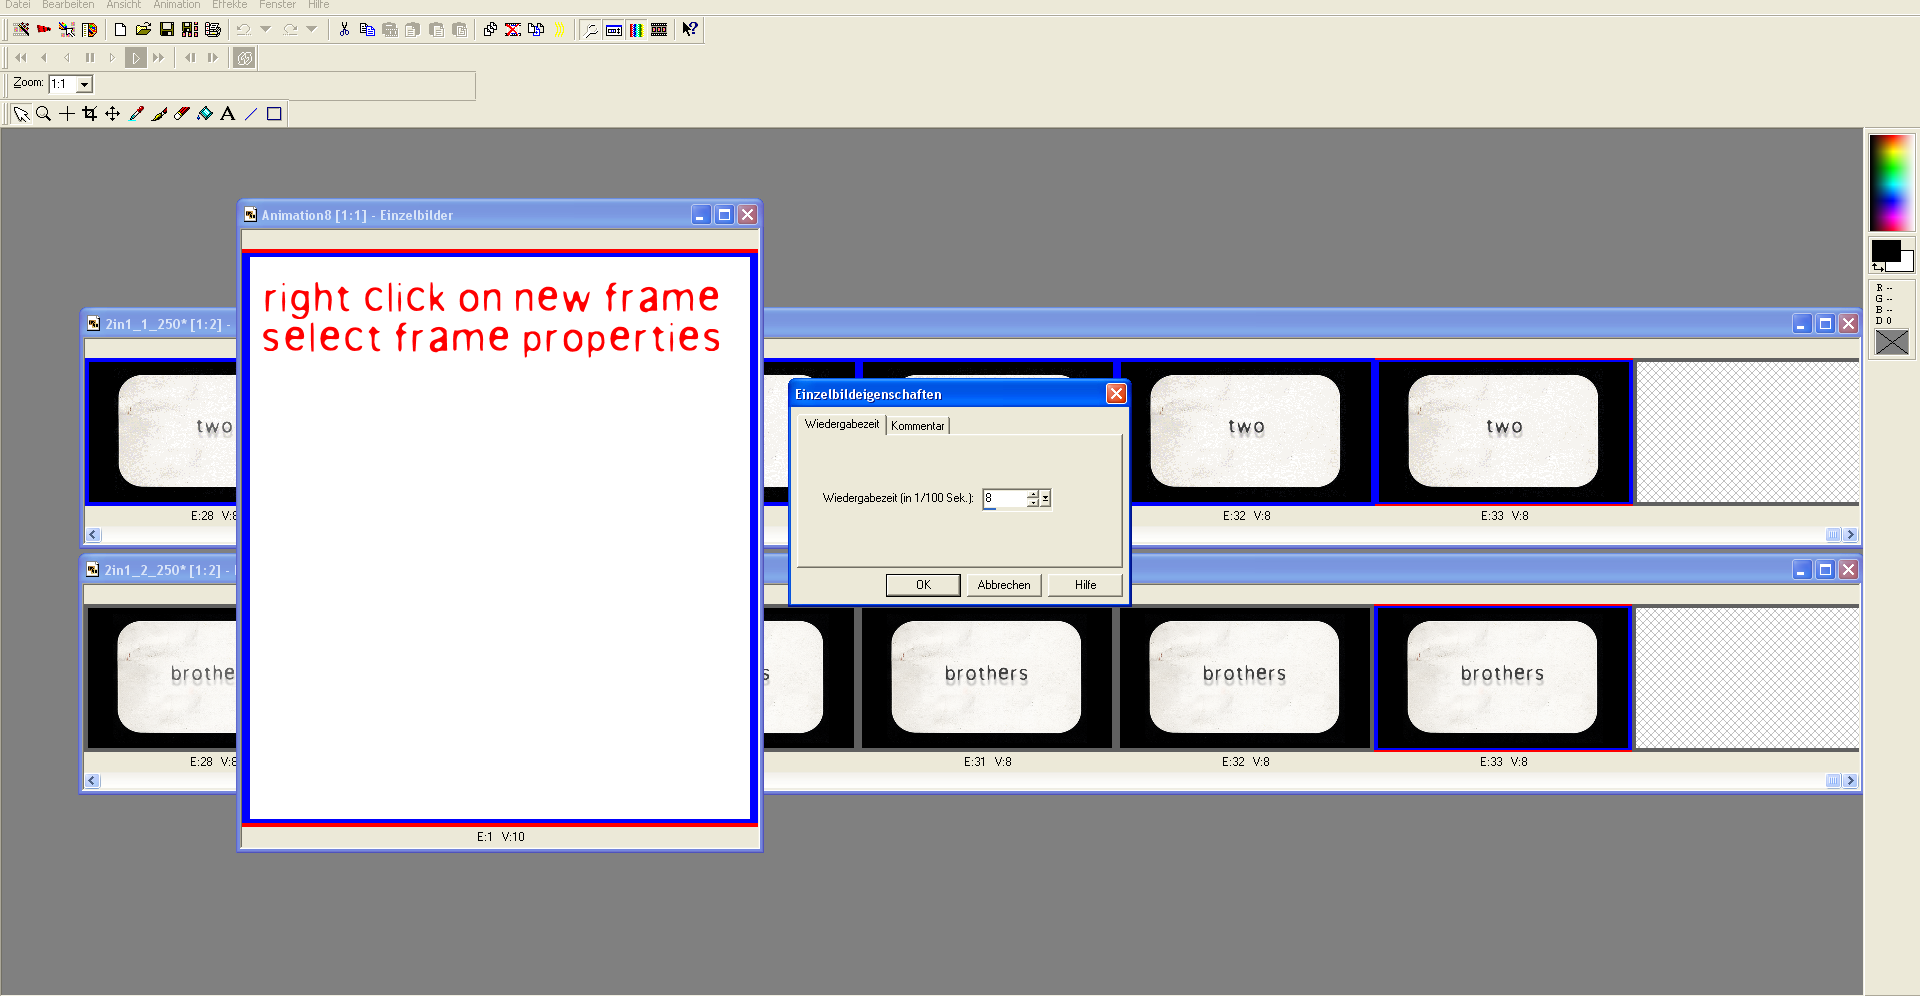
3. right click on white image, choose FRAME PROPERTIES, change the frame delay of your new image to match your animations
 |
DIRECT LINK
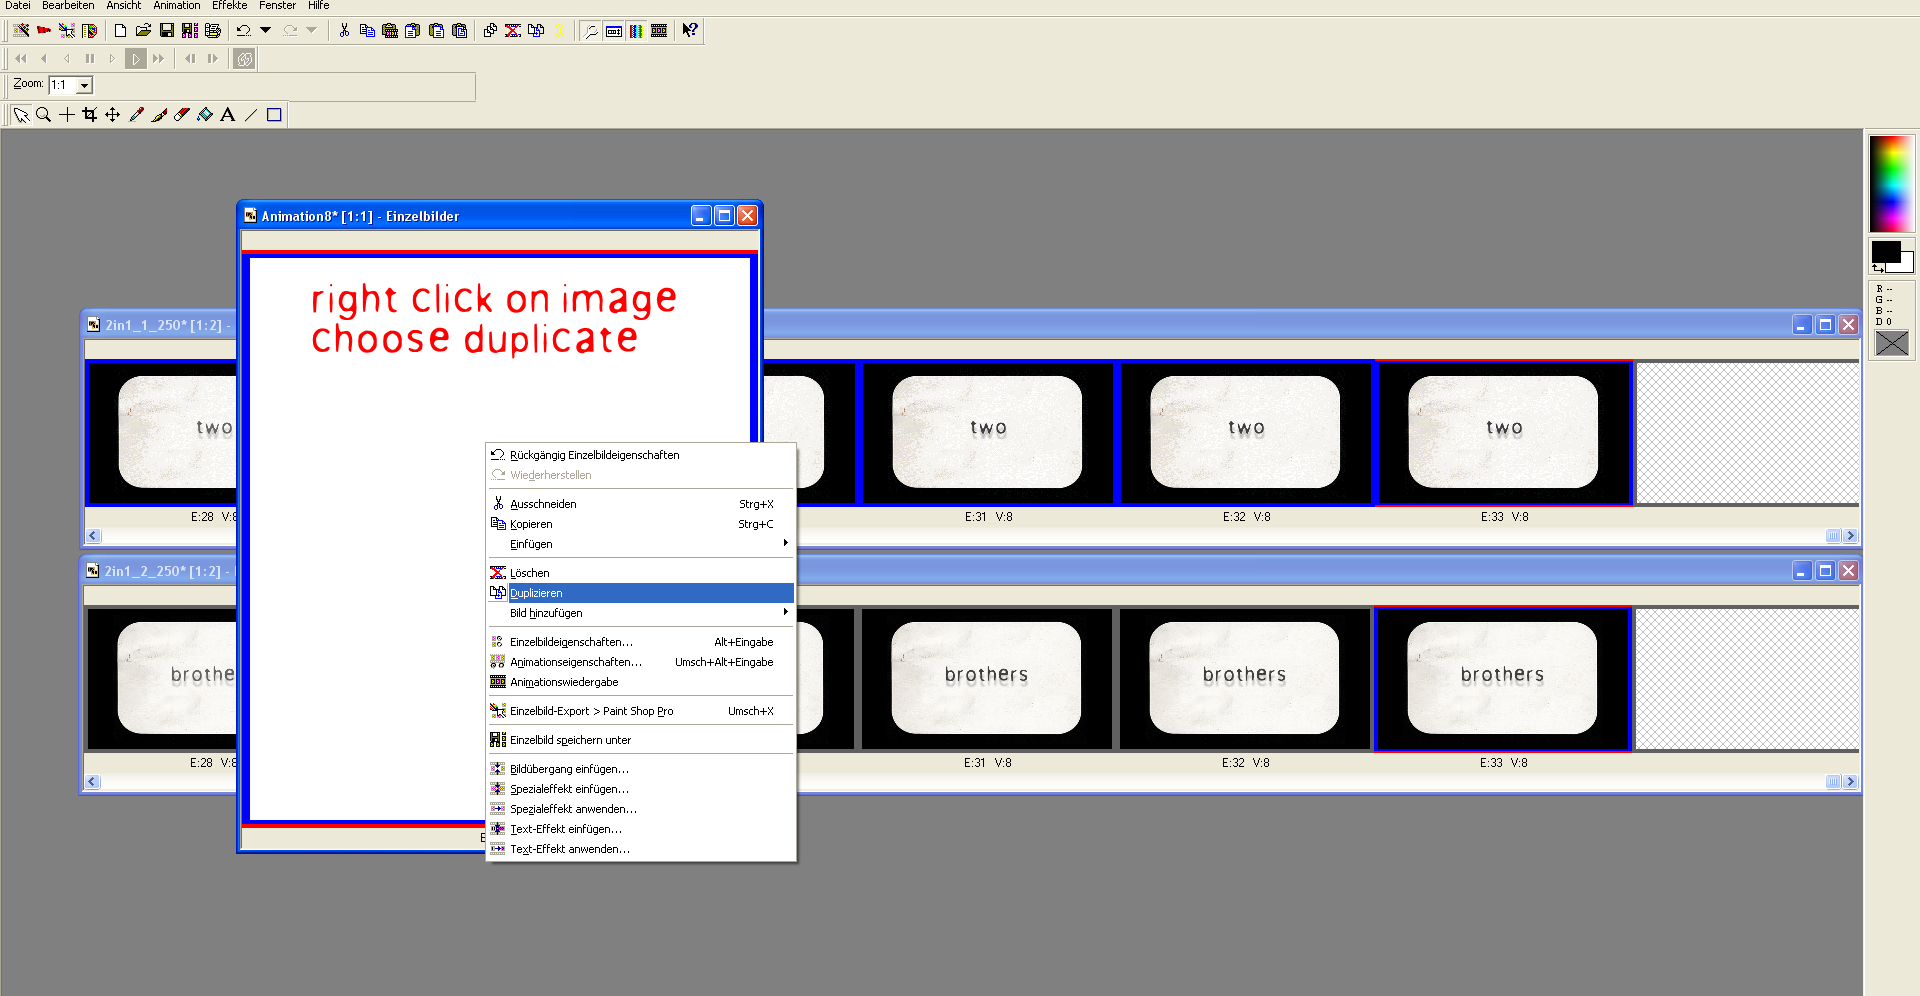
4. Now you need to match the number of frames, right click on the white image, choose DUPLICATE, repeat this until you have the same amount of frames as you have for your animations
 |
DIRECT LINK
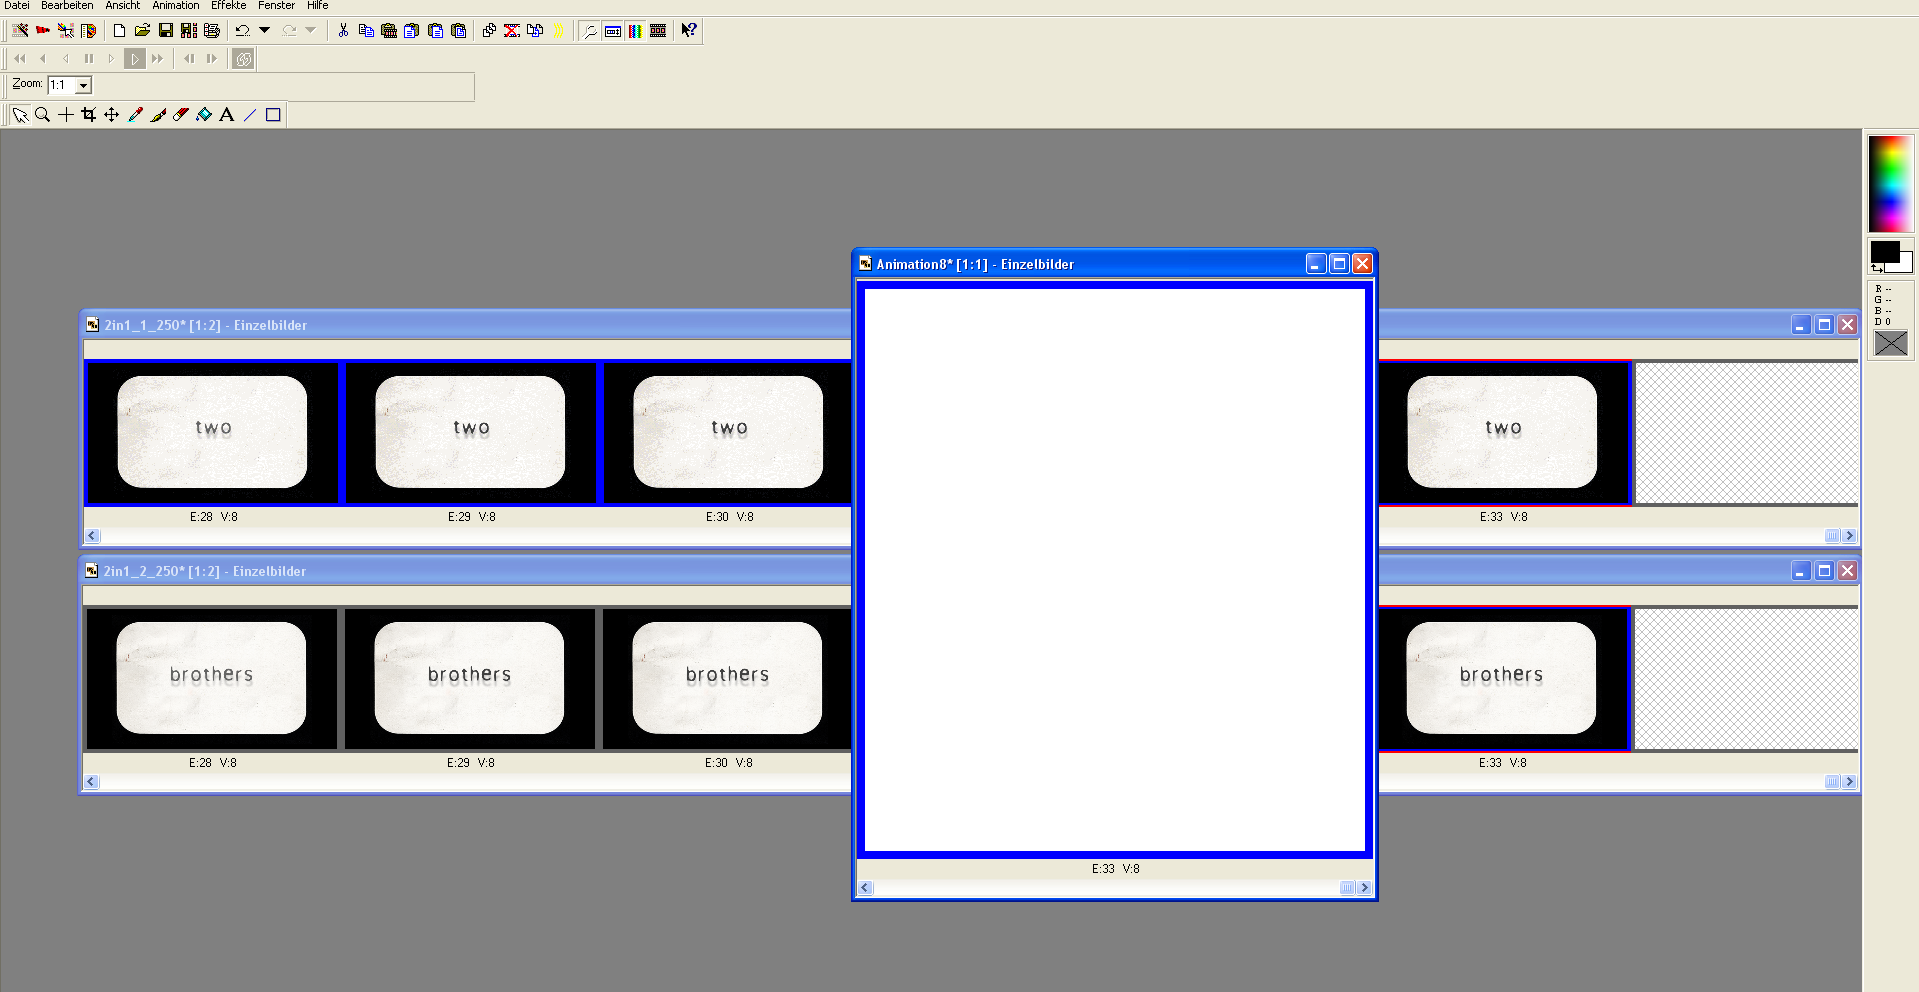
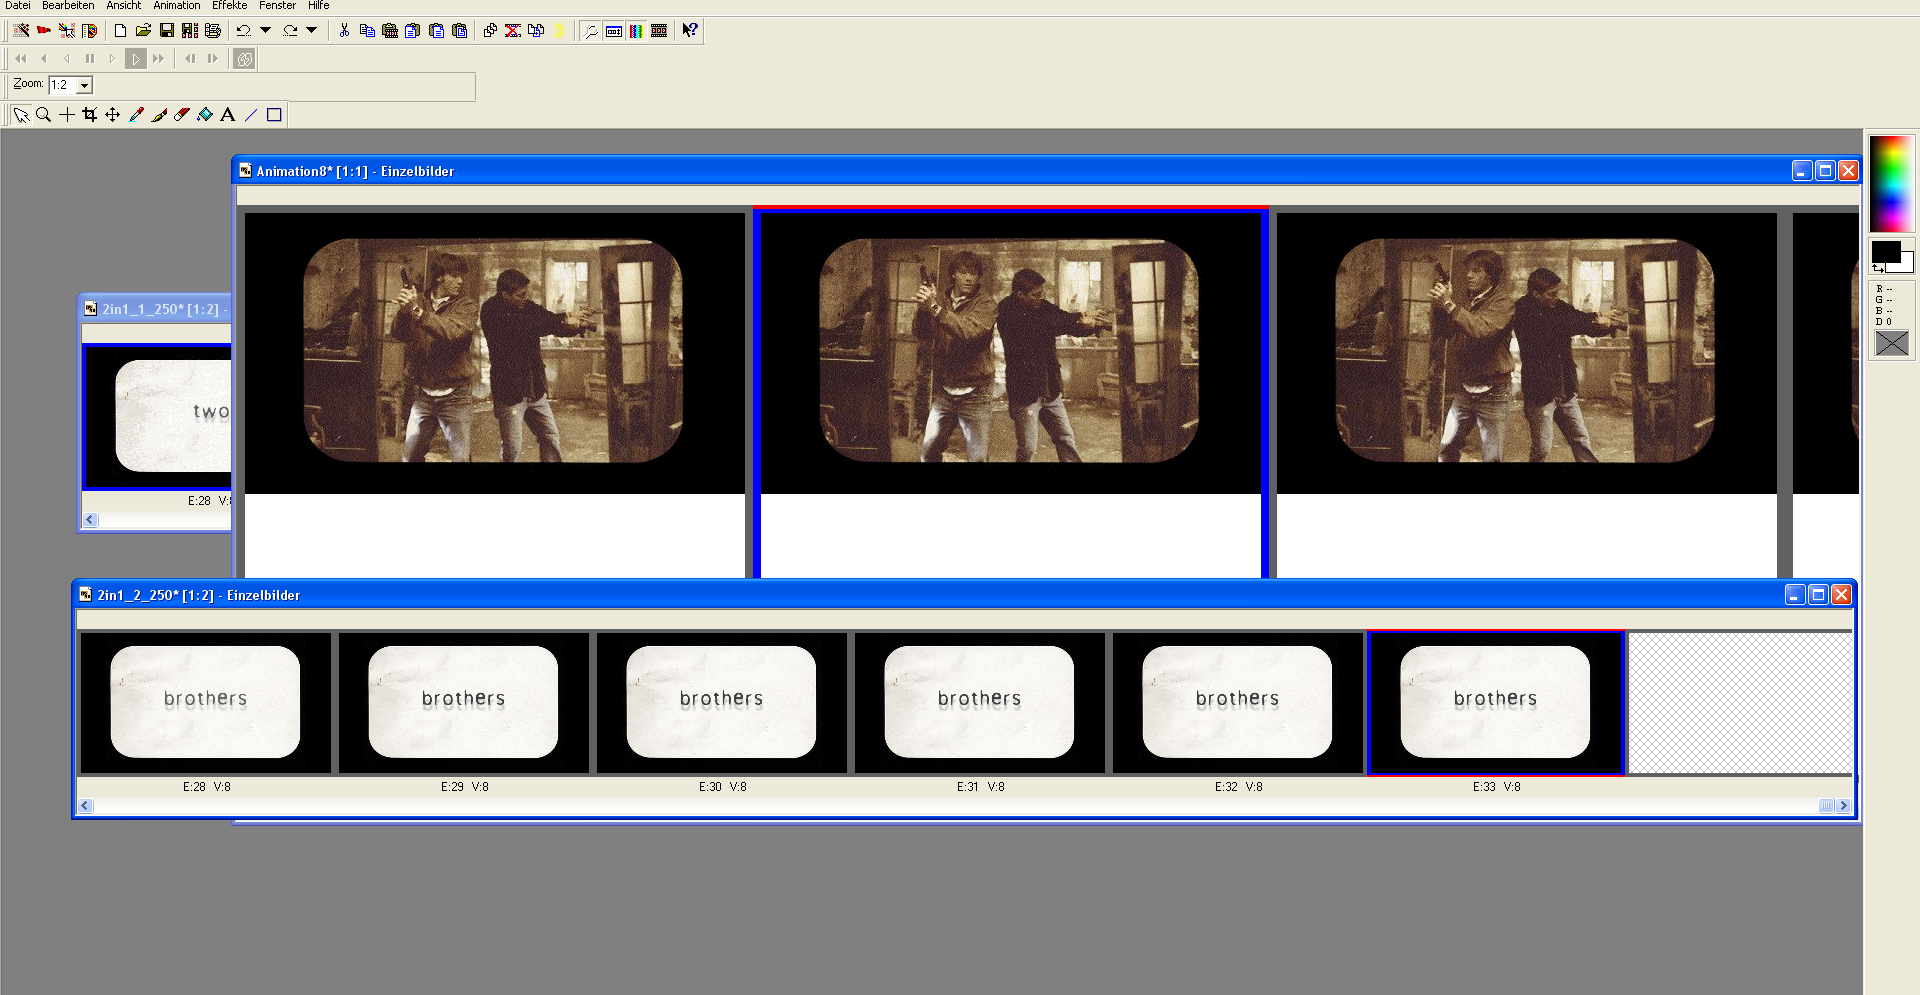
5. Like this:
all three anis have the same amount of frames (E:33), and the same frame delay (V:8)
 |
DIRECT LINK
okay, now we have the basics covered, let the fun begin, aka create a 2in1
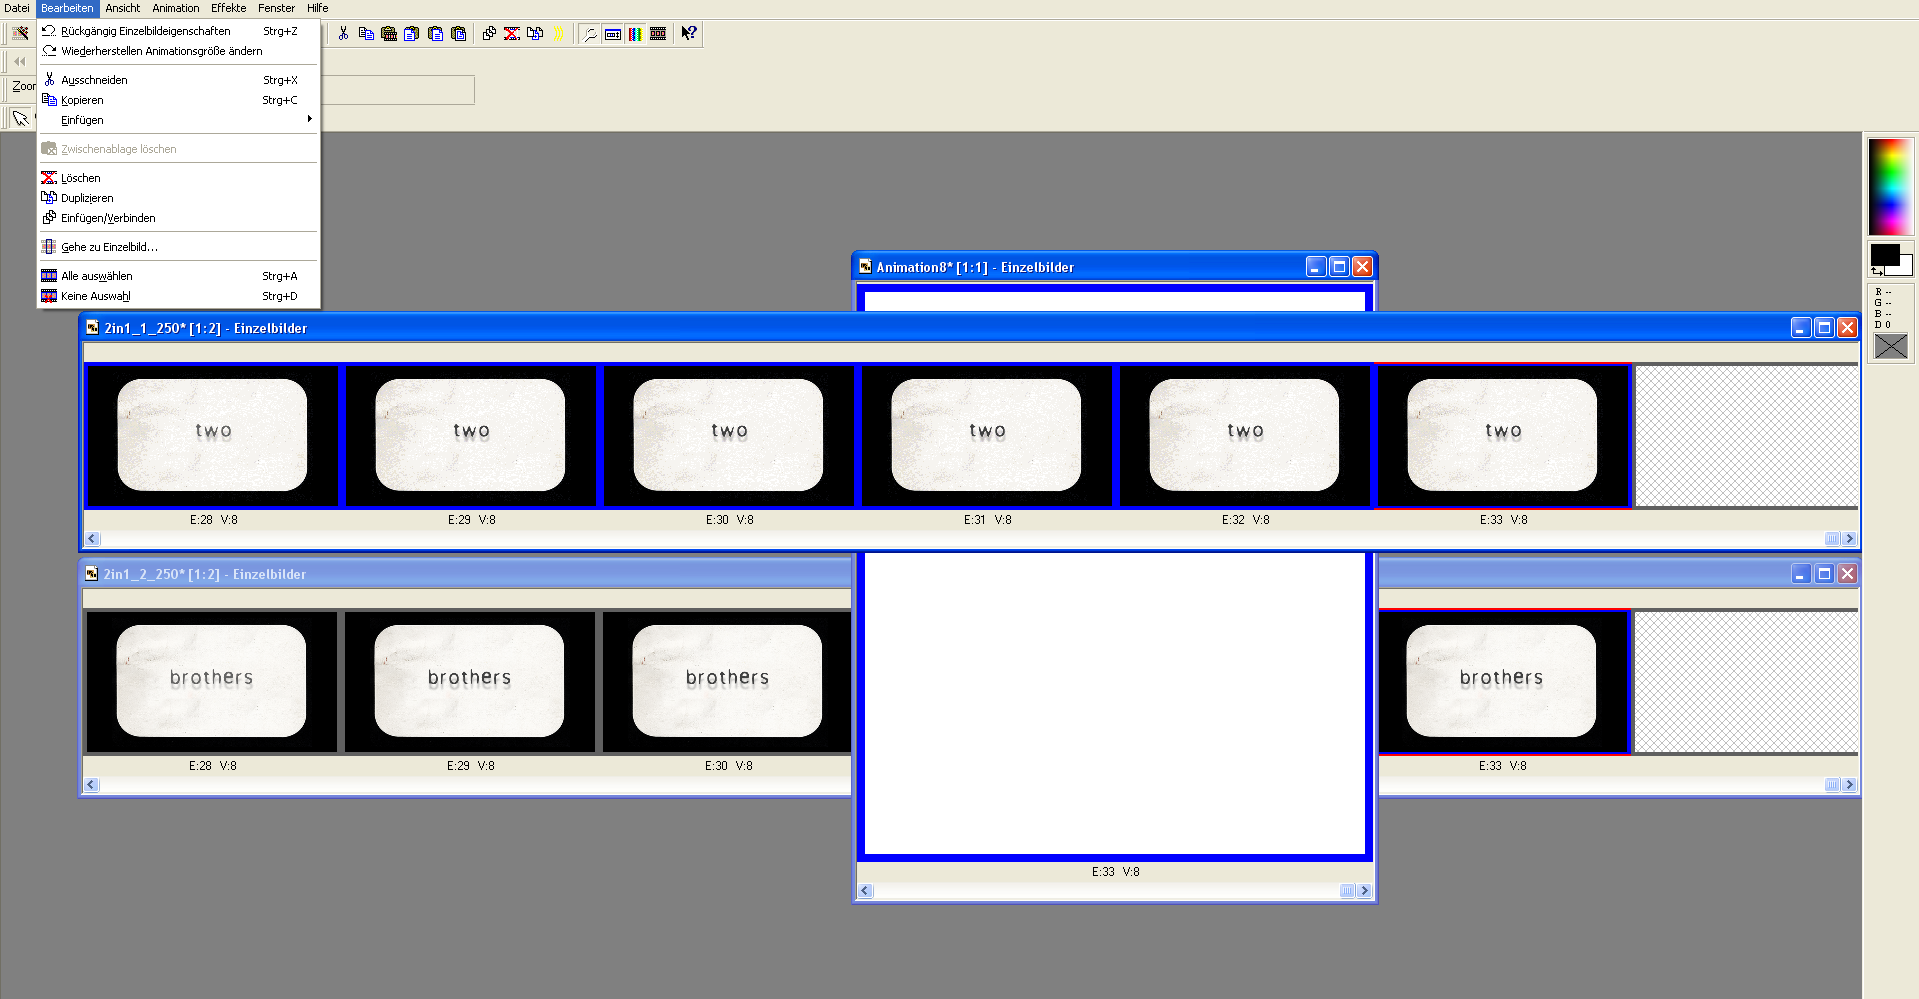
6.- select the 1st animation (click on the blue frame that´s on top of the animation frames) go to FILE - SELECT ALL - FILE - COPY
 |
DIRECT LINK
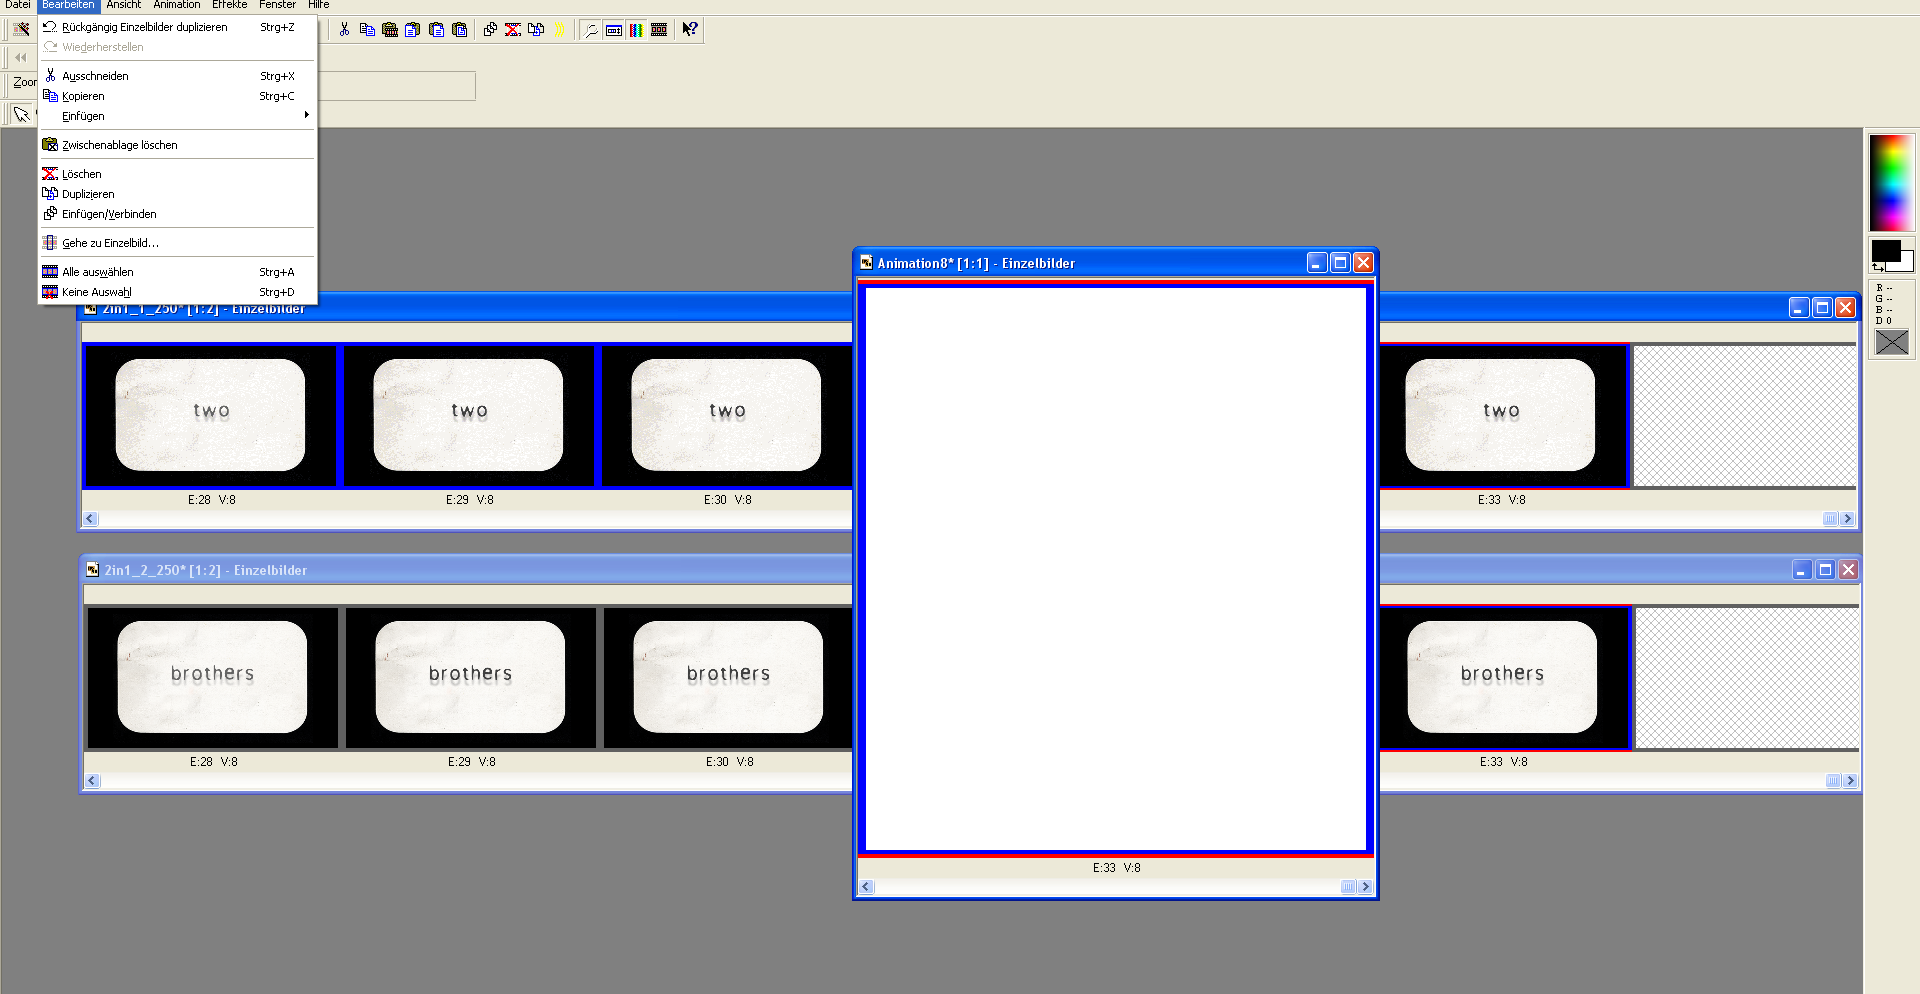
7. - select the white animation (click on the blue frame that´s on top of the animation frames) go to FILE - SELECT ALL - FILE - PASTE - INTO SELECTED FRAME
 |
DIRECT LINK
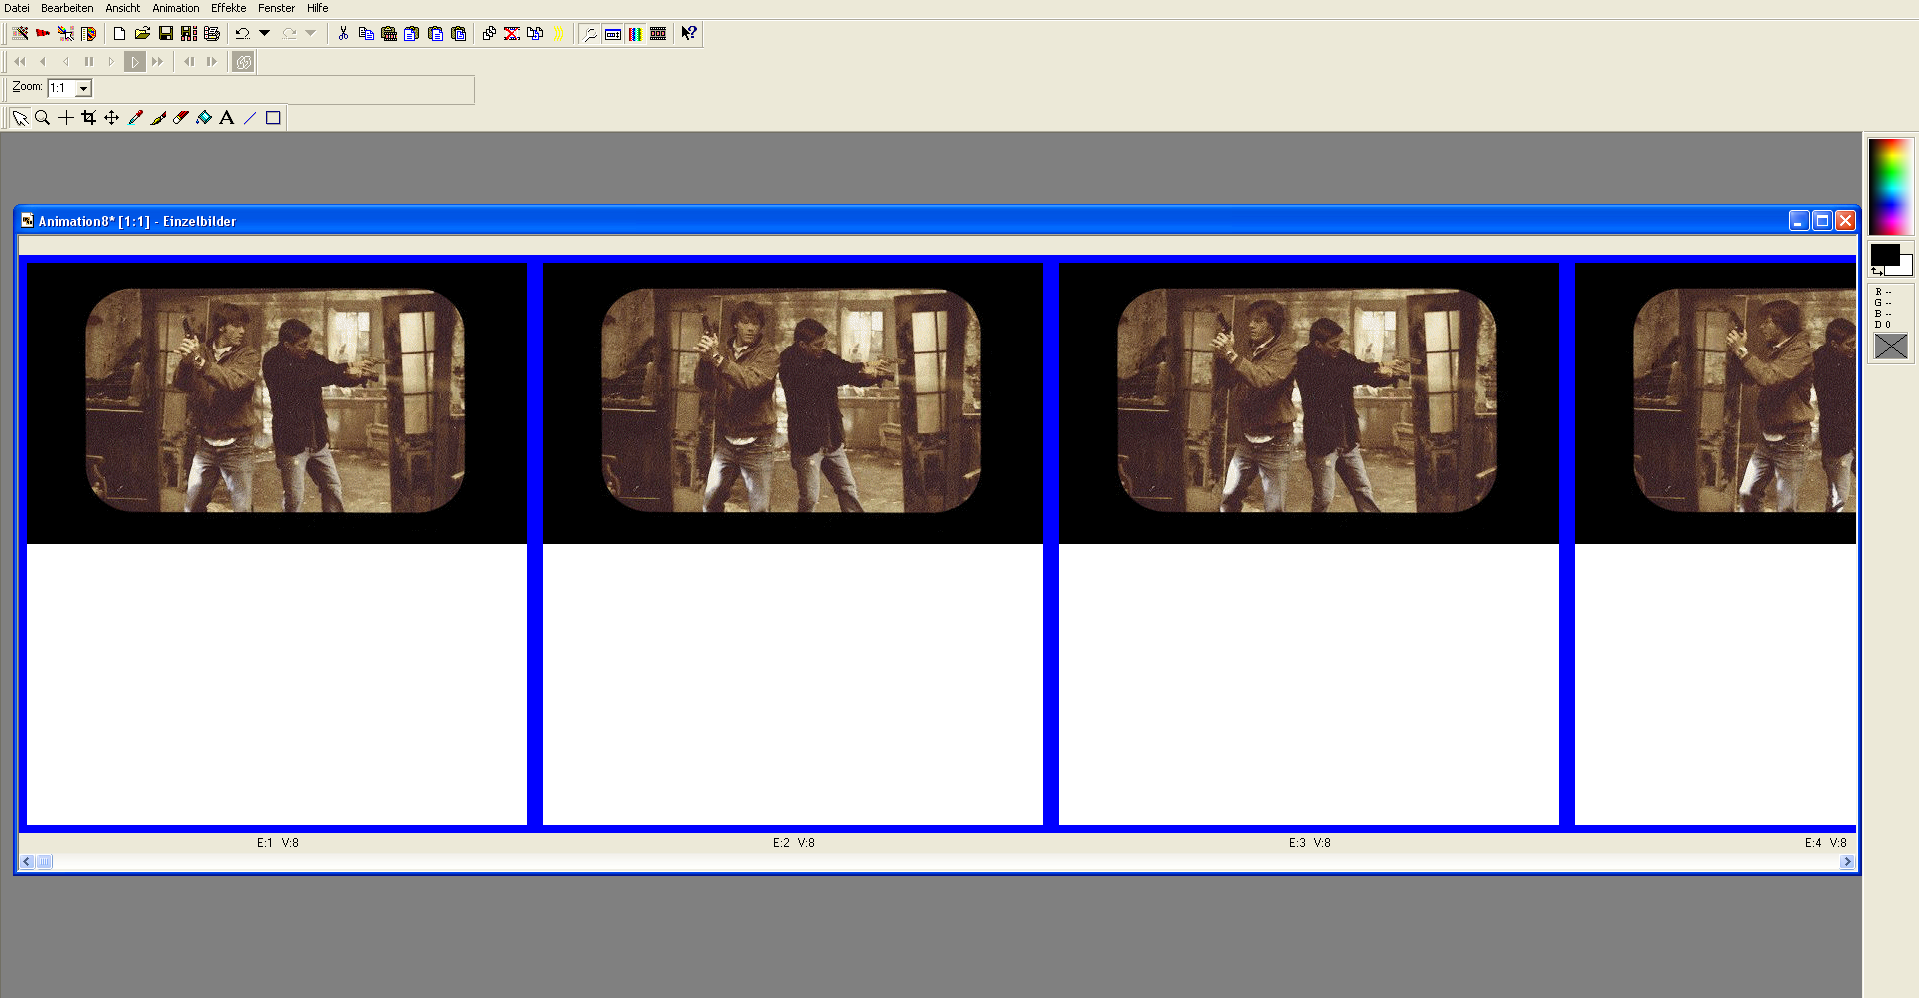
8. Animationshop will now load the copied animation, and it will show up on the new white animation. You can move the animation around with the curser, until it is where it`s surposed to be. Then *drop* the animation onto the white frame, by clicking the left mouse key.
 |
DIRECT LINK
because you`ve selected and copied all frames, Animationshop will past all frames of the first animation into the selected frames of the white animation, one after the other = animation
That is why it is IMPORTANT to have the same amount of frames for each animation.
9. Repeat steps 6-8 with your 2nd animation
 |
DIRECT LINK
You can preview your animation by clicking the "View Animation" Tool on the Top Toolbar
 |
DIRECT LINK
if you`re happy with what you see, go to FILE - SAVE AS (or hit F12)
(if it is too fast or too slow, go back and change the frame delay as explained. The higher the number, the slower the animation)
finished animation

what you could also do, and I think it looks even better, is:
make the text of the first animation fade in, and the text of the 2nd animation fade out
result

sooo, this is it, my "how to create a 2in1 with Animationshop3" tutorial.
This is good for a lot of fun. You can create a 2in1, a 3in1, a 4in1, aso.
You can create a combination of stills (and/or text) and an animation, like this graphic I`ve done some time ago:

the basics are all the same, just an advanced version of copy/paste, as explained above.
The details of each of my animations, well, to explain everything I do for each and every ani would take forever and a day. Sometimes my way is a bit complicated and tricky, but usually I get what I want to have.
If you have any kind of question, fell free to ask.